Writing your thesis with LyX - Part II
Previously, we skimmed through the basic functionalities of LyX. However, to reach our final aim which is writing the thesis, we need to review more advanced format options.
In this post, we will describe how to add the fundamental pieces to the content of any thesis. The third part of this guide will address all the aesthetics and format details.
1. Generating the thesis structure
For our example, we will organize the following table of contents:
- Table of contents.
- Prologue.
- Chapter 1.
- Chapter 2.
- Appendix A.
- Appendix B.
- References.
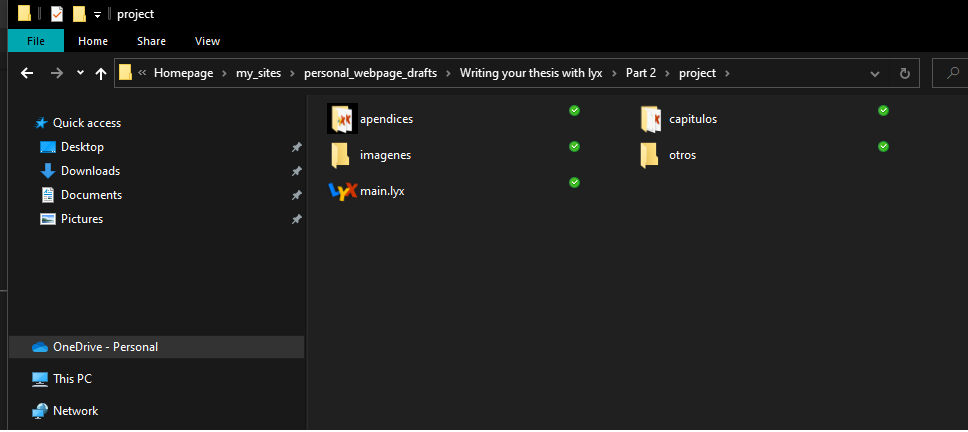
We will create the following tree of files and folders:
-
main.lyx. - Folder “apendices” with two files
apendix_A.lyxandapendix_B.lyx. - Folder “chapters” with two files:
chapter_1.lyxandchapter_2.lyx. - Folder “images” where we will save any image for the document.
- Folder “others” where we will save any other relevant file.
Our project folder, containing the tree of files should look like this:
2. Explaining a bit the structure
We generated a structure around the main.lyx file. It contains all the details about the style and configuration of the document. Therefore, the files of the appendices and chapters will contain the actual content, i.e, the place where the actual work happens. Another way to organize the thesis would be to write the whole document in the file, generating a giant file with all the information. We will not address this approach.
Now, we will add all the “child” files (chapters and appendices) inside the “father” file (main.lyx). We will also select the class “Book” for now for all the files.
We import each of the files in the following way. We add some random content and compile it to obtain the first preview of our thesis.
If we want to add the appendices, we go to Document -> Start appendix here. We add the appendix files in the same way as in the video above, and we will obtain the following result

Do not forget: in this guide we will not deal with the specific format and their details. The third part of this guide will contain this topic.
3. Modifying the content
The structure is already defined, it is time to add the actual content. We will see how to add equations, images, and tables.
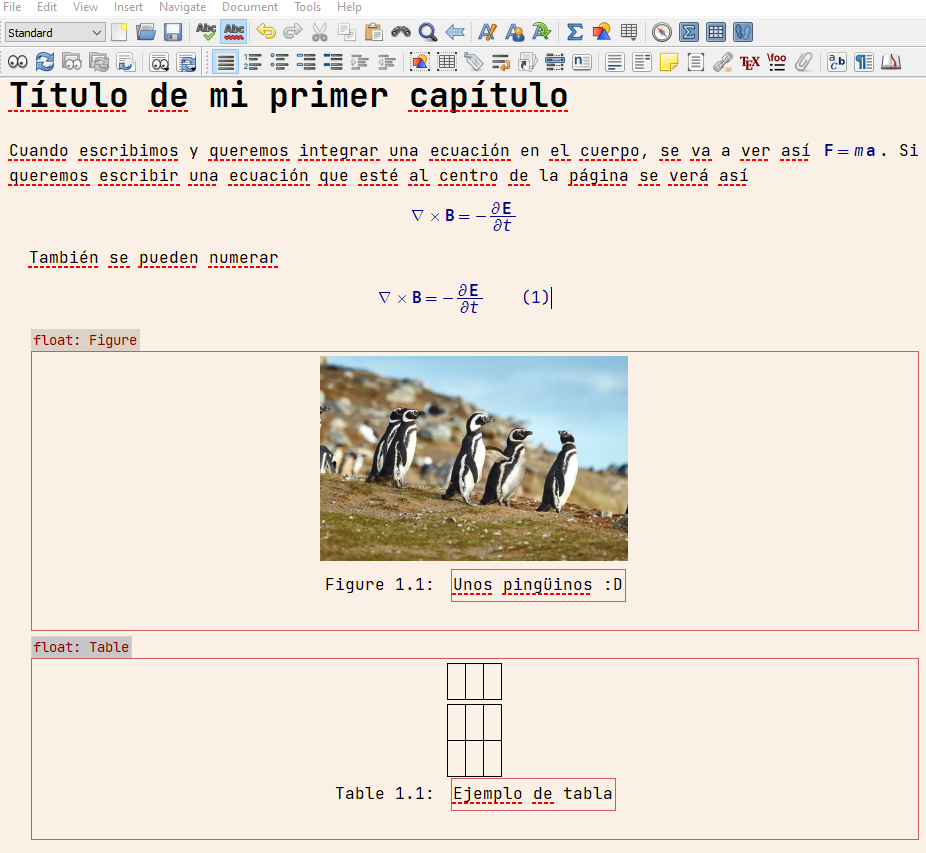
We will add our first chapter in the file chapter_1.lyx. With the menu in the top left corner, we select “chapter” in our file and we will add a name to it. In this example, I will use “Título de mi primer capítulo” (Title of my first chapter, in spanish), as you can see in the following images.
3.1 Equations
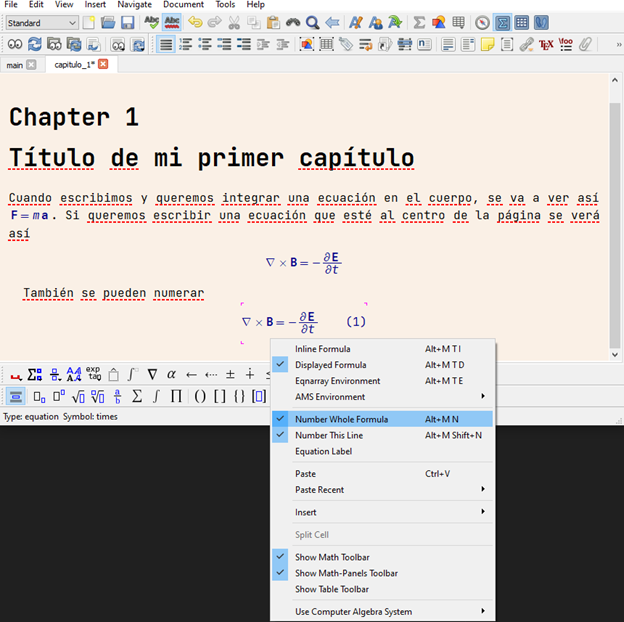
We will need two types of equations: inline and presented. Any mathematical character which needs to be integrated into the paragraph will be “inline” and to insert one we press ctrl+m.
Equations or mathematical expressions that must be centered in the page fall into the “presented” category. To insert one we press ctrl+shift+m.
We can also add the numbering to the equations with right click over them and selecting the numbering option. For example:
3.2 Images
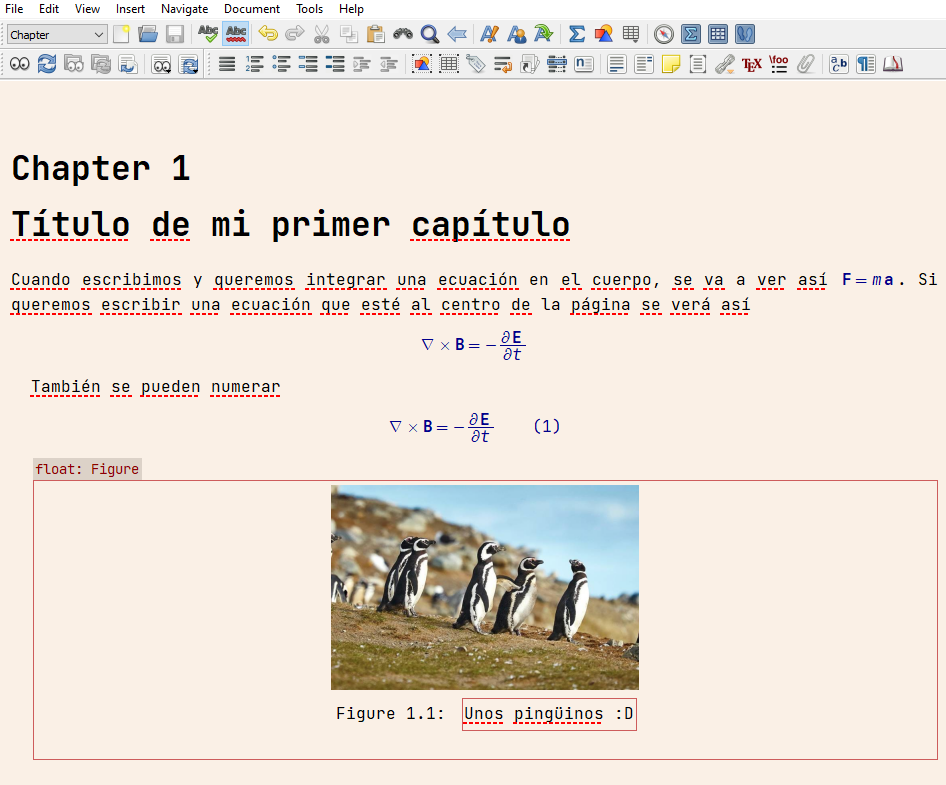
The images fall into the category of “floats” in LyX. To add one, we go to “floats” menu and we insert the figure.
Insert -> Float -> Figure
Finally, inside the field, we add an image.
Insert -> Graphics
We look for our images and we should obtain a result similar to this (after centering the paragraph)
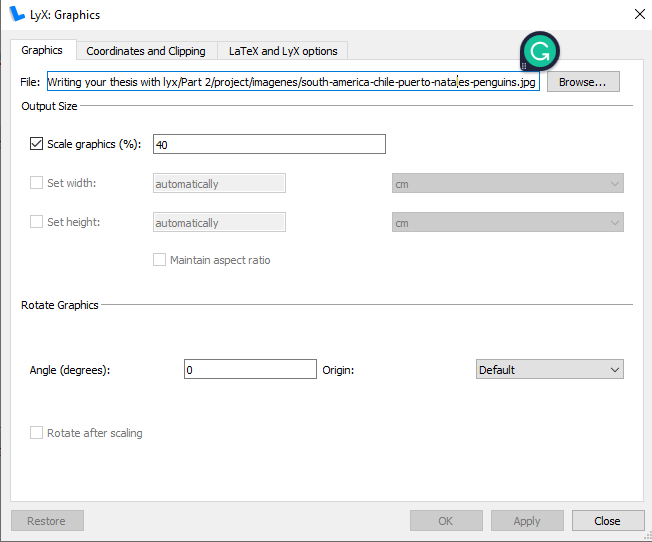
Different options related to the size can be also modified in the contextual menu deployed when you do right-click over the image. Here, we can change the figure size in the document, or even change the images, among many other options.
3.3 Tables
The tables are another type of floats. We determine the size of the table as you can see in the following screenshot. The style of the table might be as well modified using the contextual menu that is deployed when you do right-click over the table.
Insert -> Flot -> Table
Finally, inside the generated field we insert the table.
Insert -> Table
We insert the table with the required dimensions (after centering the paragraph) and we will obtain a result similar to this
3.4 Adding labels and crossed references
The information such as equations, tables, and images must be numbered, so we can reference them in the next sections. To do this, we need to add a “label”.
Fortunately, these labels can be referenced all along the document. Let’s see an example: we will reference the figure of the penguins in a paragraph
For numbered equations, and other floats the principle is the same: add a label and add the crossed reference.
4. Closing remarks
I have decided to do this part a bit redundant with the first part of the guide to reinforce some concepts. Knowing how to integrate all these elements in a document will be enough to write all the content. In the following part of the guide, we will see how to add citations to the references and more advances format options.